Testing
https://github.com/callstack/react-native-testing-library
Why needed?
Unit testing ensures that all code meets quality standards before it's deployed. This ensures a reliable engineering environment where quality is paramount. Over the course of the product development life cycle, unit testing saves time and money, and helps developers write better code, more efficiently.
Installation
npm install --save-dev @testing-library/react-native

# or

yarn add --dev @testing-library/react-native
Additional Jest matchers
In order to use additional React Native-specific jest matchers from @testing-library/jest-native package add it to your project:
npm install --save-dev @testing-library/jest-native

# or

yarn add --dev @testing-library/jest-native
Custom Jest Preset
- Then automatically add it to your jest tests by using setupFilesAfterEnv option in your Jest configuration (it's usually located either in
package.jsonunder "jest" key or in ajest.config.jsonfile). - If not automatically added, you need to add the following code to
package.json:
"jest": {
    "preset": "react-native",
    "setupFilesAfterEnv": [
      "@testing-library/jest-native/extend-expect"
    ],
    "transformIgnorePatterns": [
      "node_modules/(?!(jest-)?react-native|@?react-navigation)"
    ],
    "setupFiles": [
      "./node_modules/react-native-gesture-handler/jestSetup.js"
    ],
    "moduleFileExtensions": [
      "ts",
      "tsx",
      "js",
      "jsx",
      "json",
      "node"
    ]
  }
- You need to add the following code to your
scriptsinpakage.jsonto execute the test command:
"test": "jest --watchAll"
Flow
Note for Flow users – you'll also need to install typings for react-test-renderer:
flow-typed install react-test-renderer
How to write unit tests?
- Identify the object to be test.
- Create a file containing the test code.
- Define Input, Output.
- Proceed to write test code for the defined object.
- Execute the
$ yarn testcommand to run the unit test code.
Example
There is a piece of code that allows the user to enter the length and width of the rectangle. Then display the resulting rectangular area on the screen:

In the TabOneScreen.tsx file, there is return :
return (
  <ScrollView style={[styles.bgWhite]}>
    <View style={styles.ContainerView}>
      <View style={[]}>
        <Text style={styles.Title}>Tính diện tích hình chữ nhật</Text>
      </View>
      <View style={[]}>
        <Input
          title={"Nhập chiều dài"}
          value={length}
          onChangeValue={(text) => setlength(text)}
          TestId={"length"}
        ></Input>
        <Input
          title={"Nhập chiều rộng"}
          value={width}
          onChangeValue={(text) => setWidth(text)}
          TestId={"width"}
        ></Input>
        <Text style={styles.Title}>kết quả : </Text>
        <Text testID="result" style={styles.Title}>
          {value}
        </Text>
      </View>

      <View style={[]}>
        <TouchableOpacity
          onPress={ValuePress}
          testID="perform"
          style={styles.TouchableButton}
        >
          <Text style={[styles.textWhite]}>Thực hiện </Text>
        </TouchableOpacity>
      </View>
    </View>
  </ScrollView>
)
Now write unit test:
- Input: length, Width.
- Ouput: Rectangular area.
- To perform unit test for the above function, we need to create a file
TabOneScreen.test.js. We do the following :
import React from "react"
import { render, fireEvent } from "@testing-library/react-native"
import TabOneScreen from "../../screens/TabOneScreen"

test("TabOne should render OK", async () => {
  const { getByText, getByTestId, getAllByTestId, queryByText } = render(
    <TabOneScreen />
  )
  const inputlength = getByTestId("length")
  const inputWidth = getByTestId("width")
  const button = getByTestId("perform")
  fireEvent.changeText(inputlength, "5")
  fireEvent.changeText(inputWidth, "10")
  fireEvent.press(button)

  const result = getByTestId("result")
  expect(result.props.children).toBe(50)
})
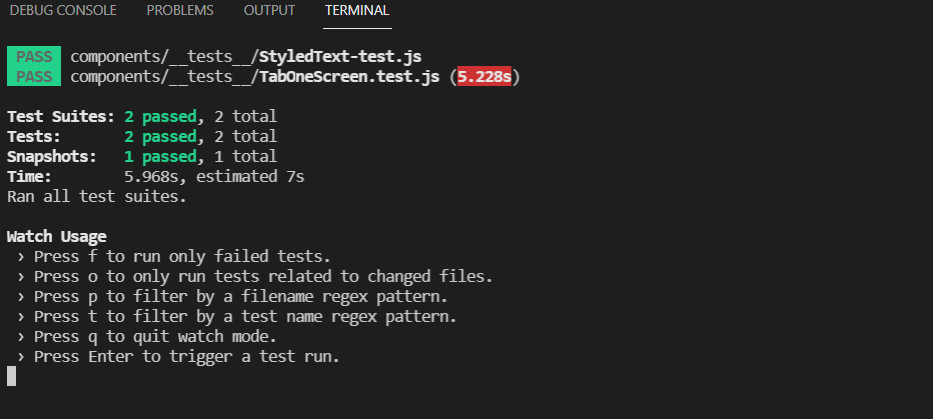
- Testing and Check the result.
$ yarn test

Queries:
Queries are the methods that Testing Library gives you to find elements on the page.
   ...
   getByTestId()
   getAllByTestId()
   queryByText()
   ...
View more in Testing Library.